Working with existing teams
Accessing the team grid
The Teams tab inside the Members section contains the grid of all teams existing in the current workspace.
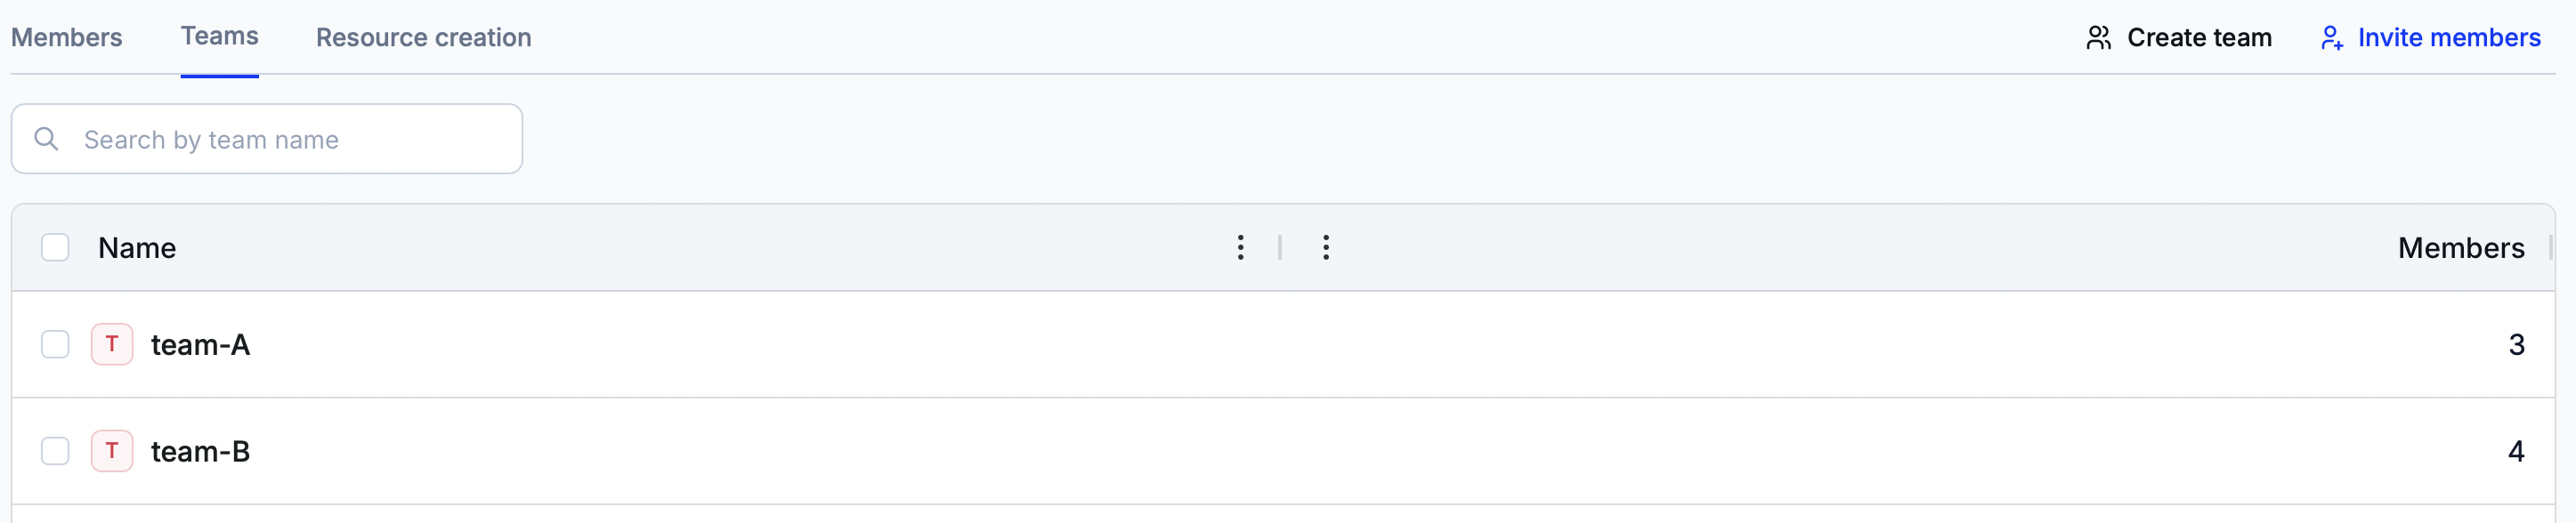
The grid has the following columns.
Column name | Definition |
|---|---|
Name | The name of the team. |
The number of members allocated to the team. |
Info
Note that one member of a workspace can be allocated to several teams.
Click on the name of the team to open its details page.
Managing individual teams
The team details page shows information about the currently chosen team and allows for editing the team or deleting it.
The page displays a grid showing all members assigned to the team.
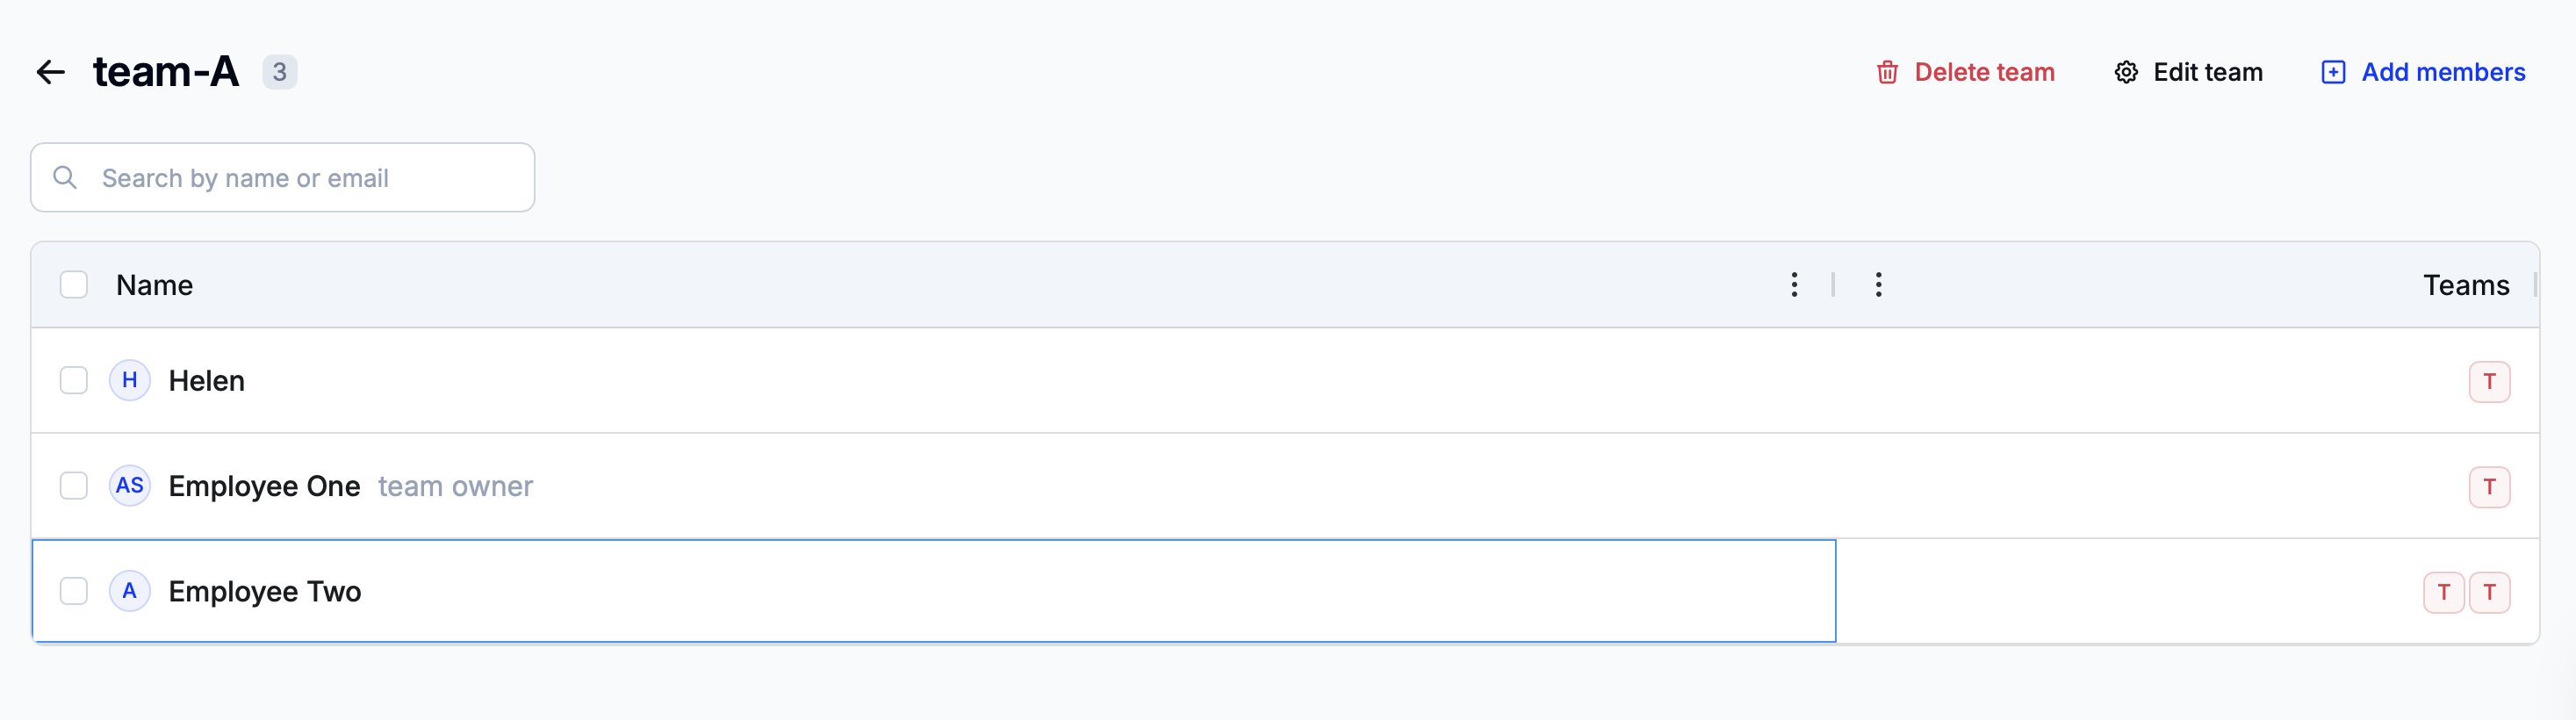
The grid has the following columns.
Column name | Definition |
|---|---|
Name | The name of the member. |
Teams | The teams to which the member is allocated. |
Deleting a team
To delete a team, click on ‘Delete team’ and then confirm the action in the newly opened modal window.
Info
It is not possible to delete a team that has one or more members. To move members between teams, click on a member’s name in the grid and then press the ‘Add to team’ button on the member details page.
Editing a team
Press the ‘Edit team’ button and the following block will appear to the right.
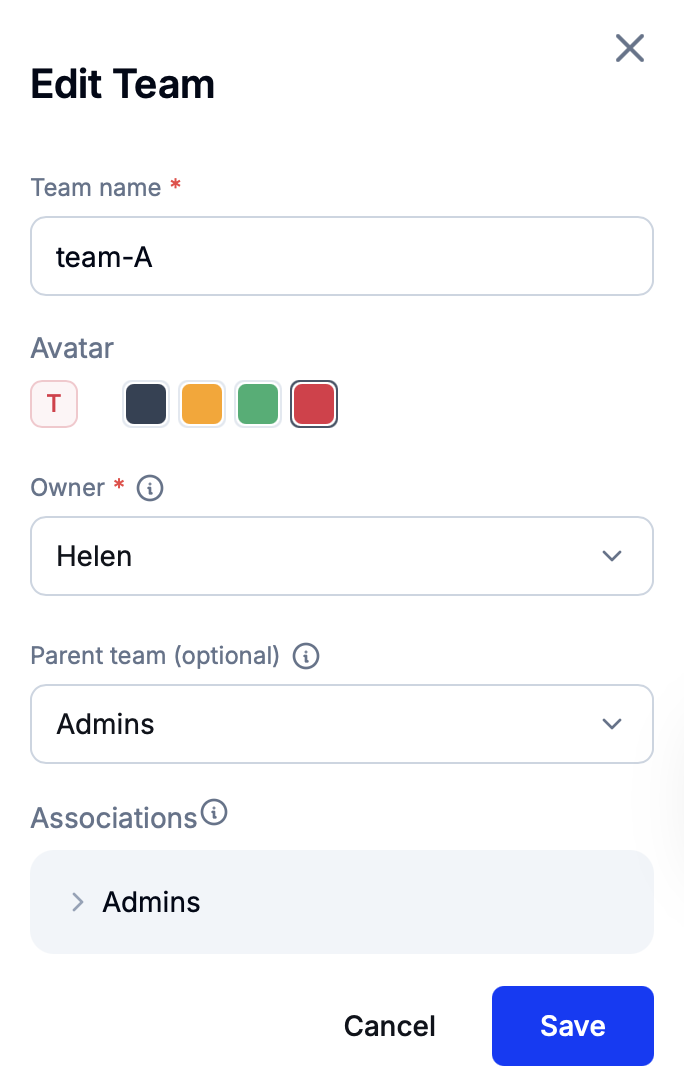
Modify the team name, avatar, its owner and its parent team. If a parent team is set, the ‘Associations’ field will display an interactable hierarchy of permissions applied to the team.
Permissions model
Read this tutorial to learn more about configuring individual and team-level access rights.
Adding new members
To add new members to a team, click on ‘Add members’. In the newly appeared block, open the ‘Members’ menu and then select all members that should be allocated to the team.
Press the ‘Add’ button to finish adding new members.