Creating and editing campaigns
To create a new campaign, click on the ‘Create new campaign’ button in the upper-right corner of the Campaigns section. This will open the new campaign wizard.
Configuring the new campaign
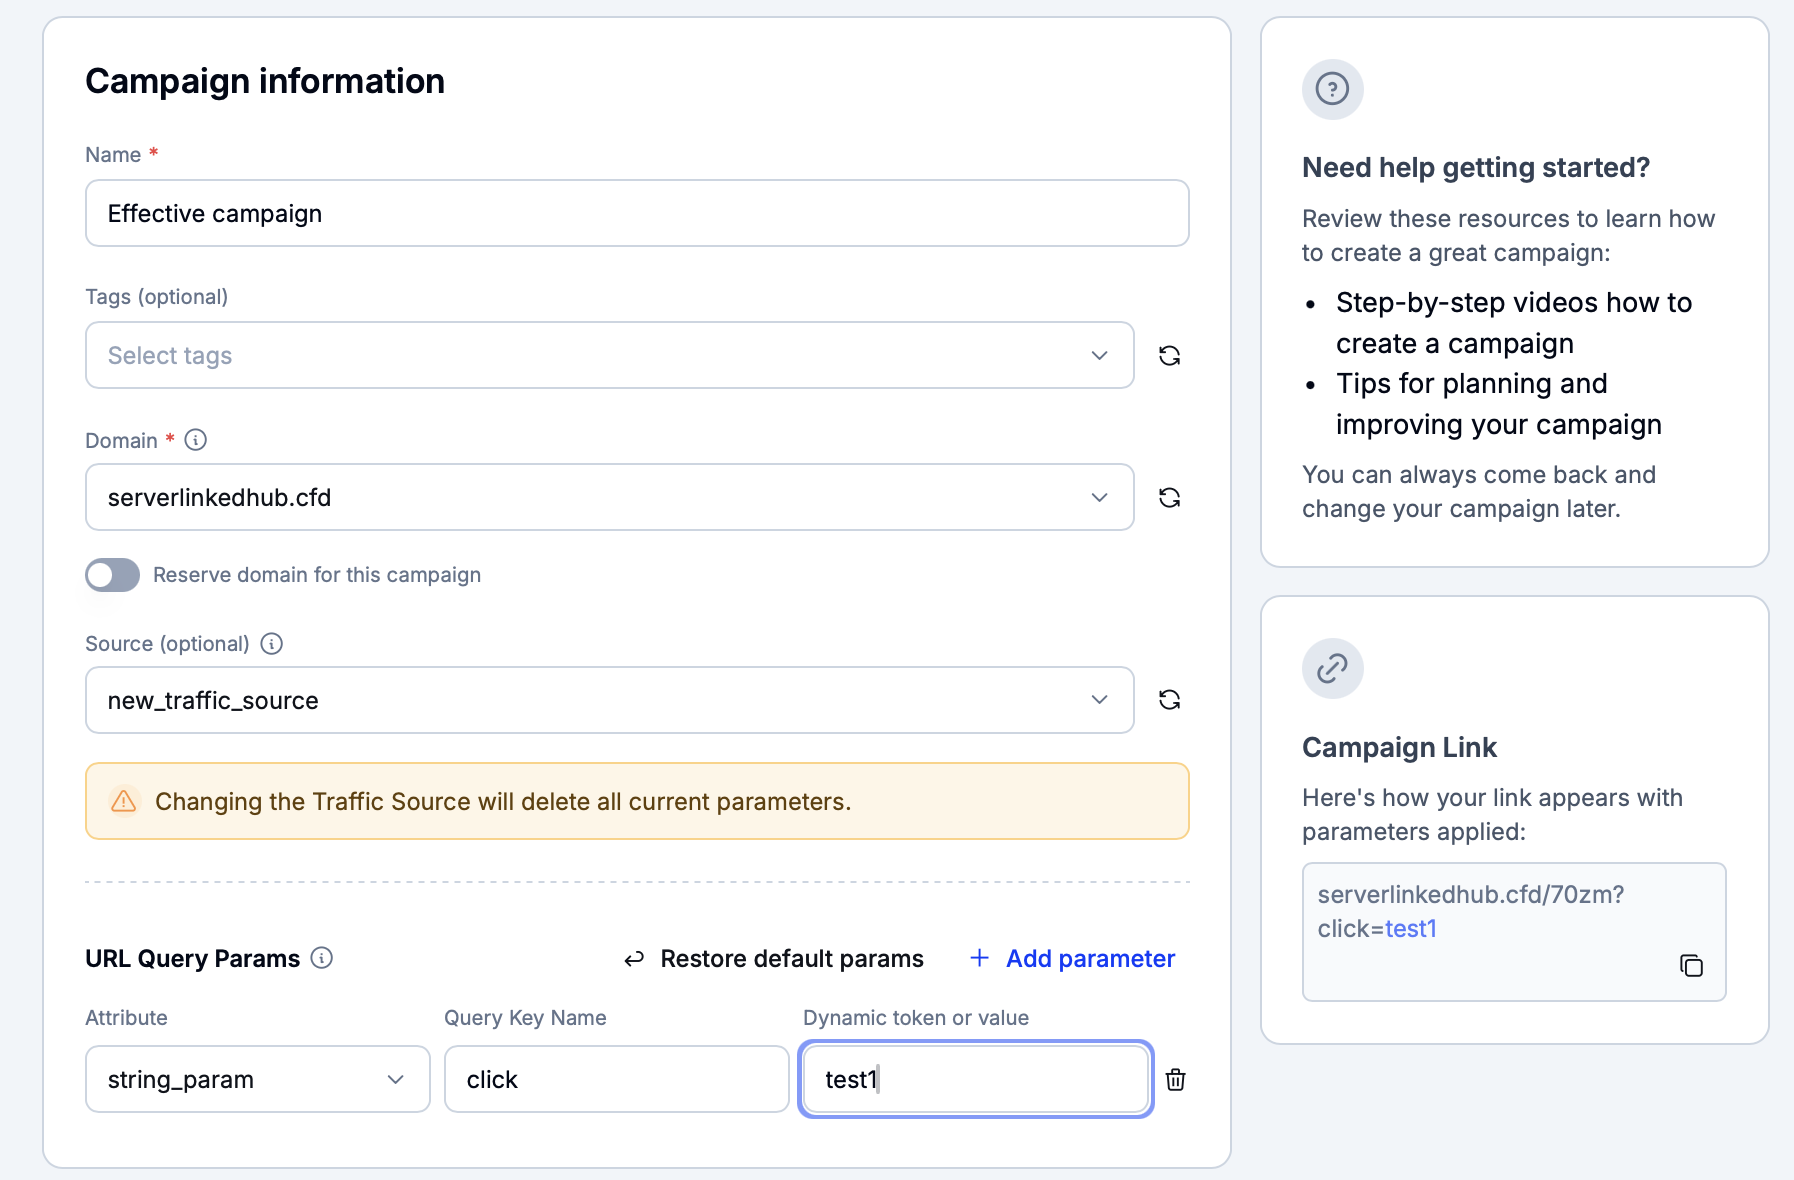
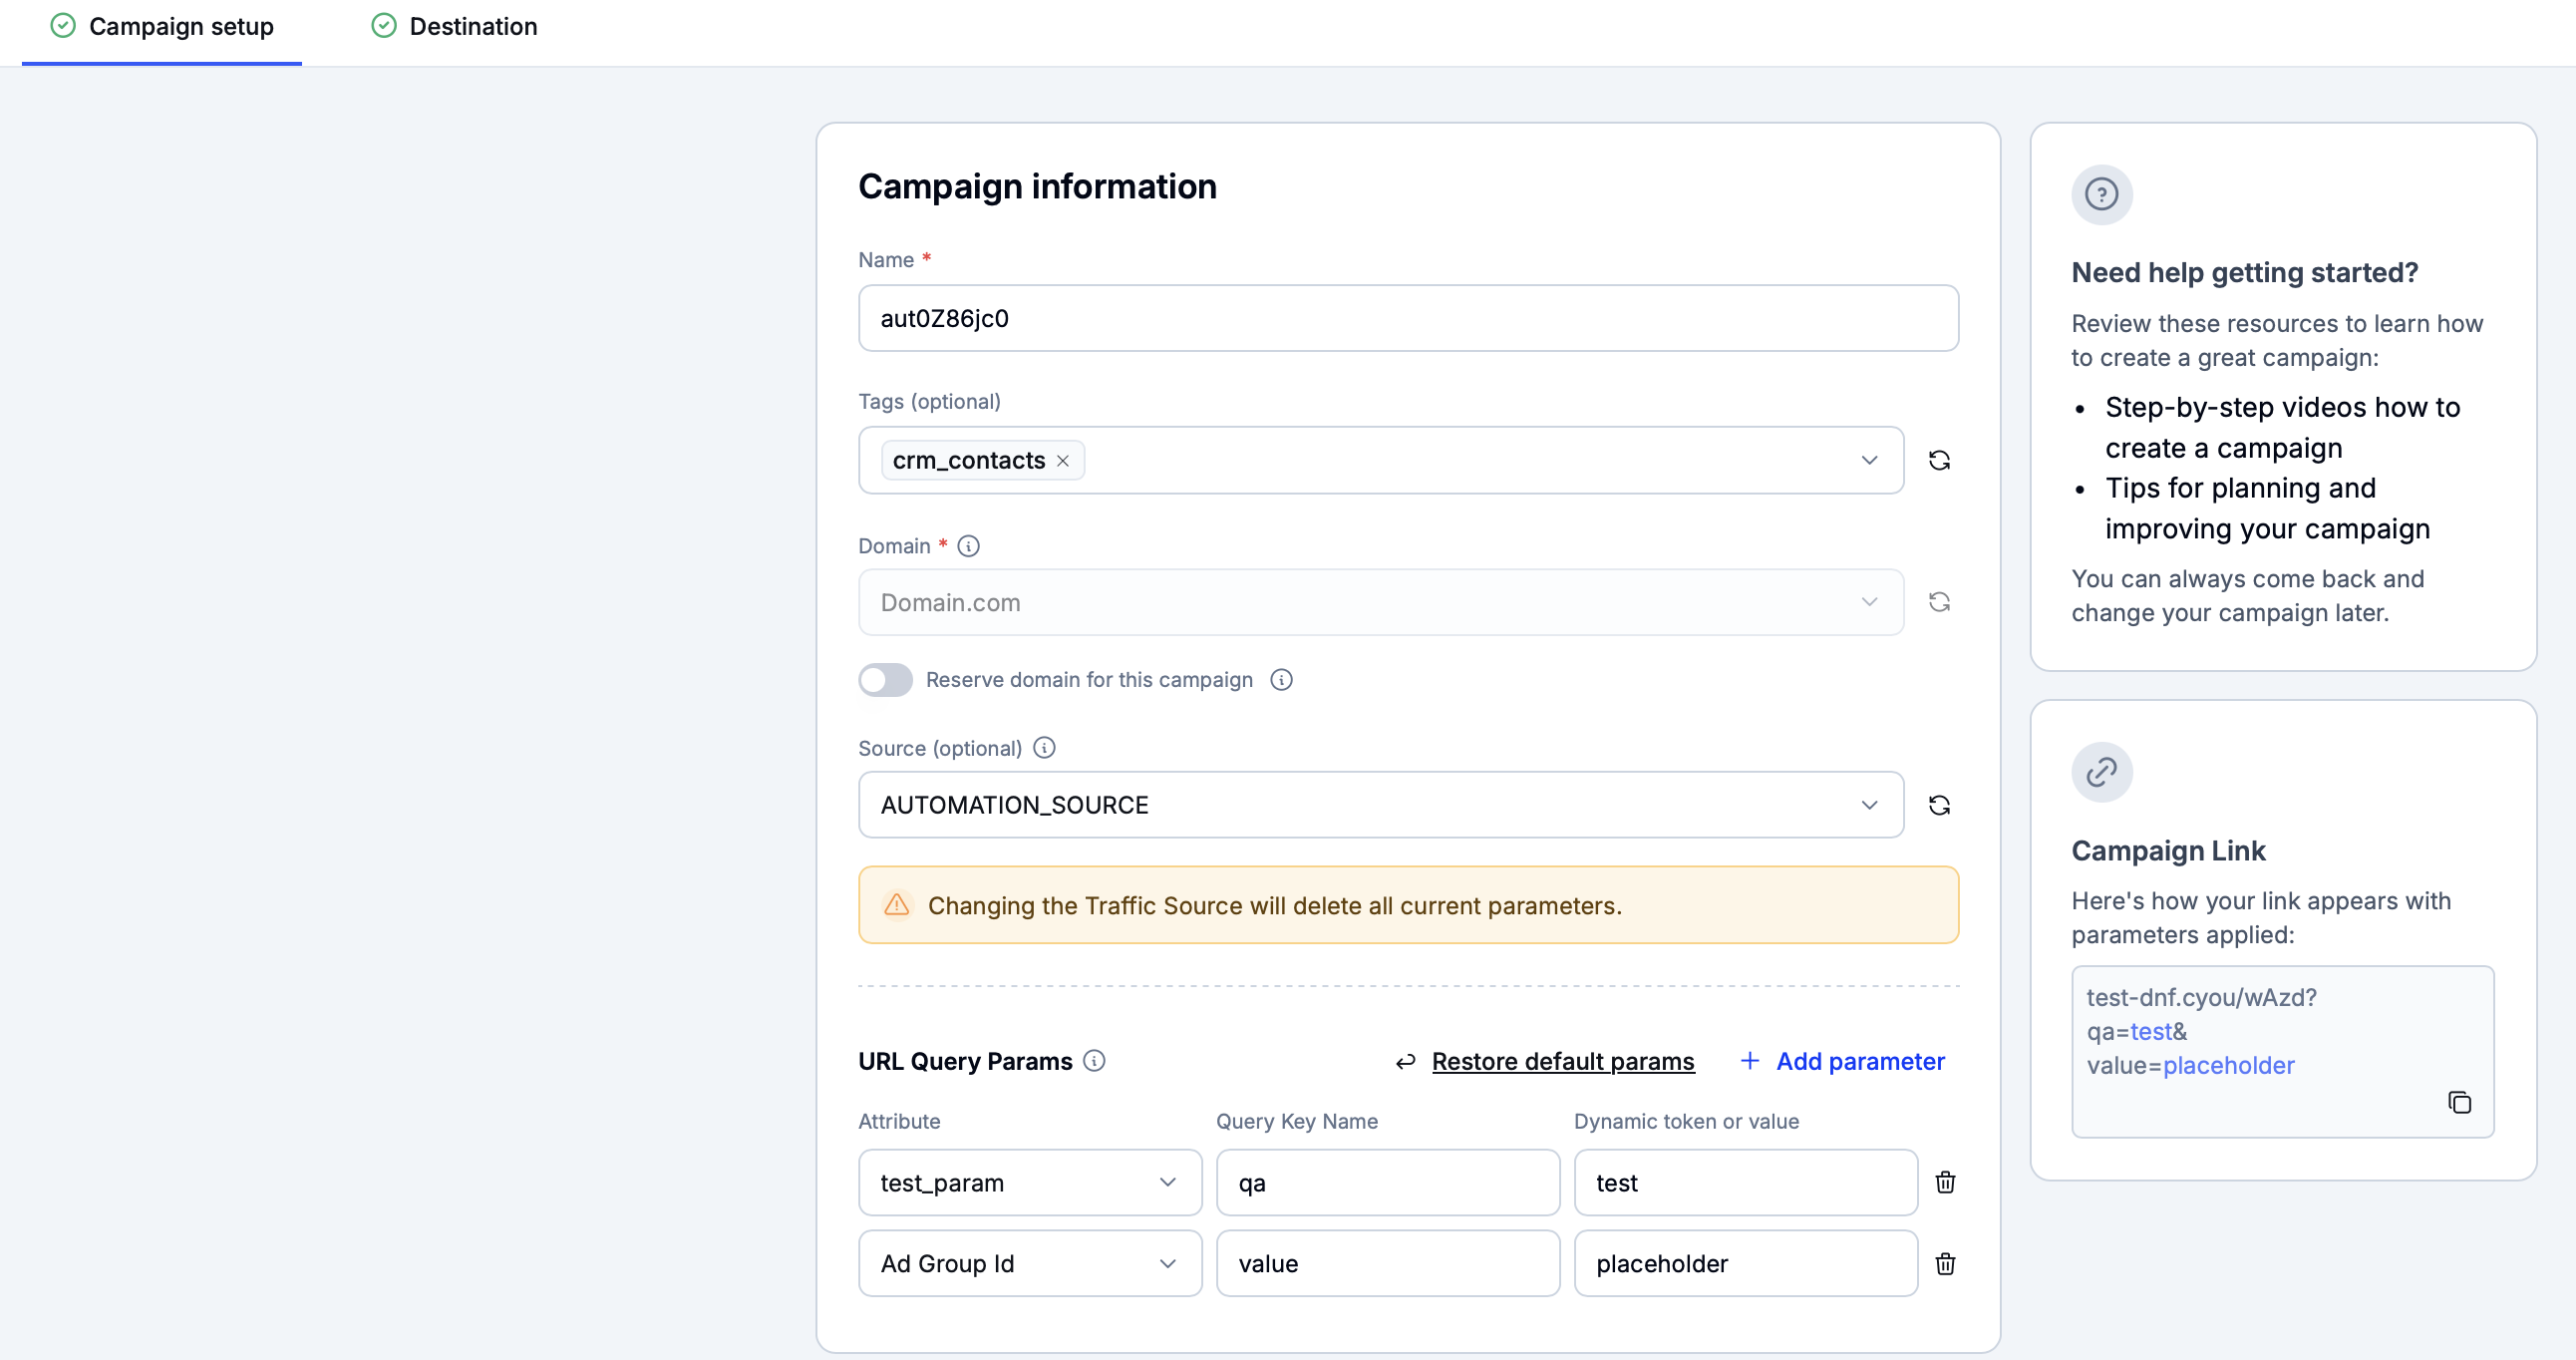
When in the Campaign setup tab, set the campaign parameters including its name, tags and domain.
Info
If the ‘Reserve domain for this campaign’ switch is enabled, the specified domain will be made exclusive to the new campaign. No other campaigns will be able to reuse the domain.
If the switch is disabled, and several campaigns are made to use the same domains, the templates used by these campaigns will be served at different routes attached to the root domain address (e.g.,
domain1.com/campaign1anddomain1.com/campaign2). In this case, the root route of the domain (domain1.com) will serve a 404 page.
Then, configure the query parameters set in the campaign URL. These parameters are primarily needed to do either of the following.
To track the campaign performance in the Reports section based on some arbitrary factors
To pass the values of query parameters into template placeholders
Optionally, set the campaign source. If a source is selected, the campaign URL parameters will automatically include the parameters from the source. However, it will still be possible to add new parameters enabled for the workspace in the Parameter settings section.
Alternatively, avoid setting the campaign source. Click on ‘Add parameter’ to add a new URL parameter from the ones available in the workspace or press the ‘Remove’ button to delete an existing parameter.
Warning
If a source is chosen and later changed, all URL parameters for the campaign will be refreshed. Any previously added custom parameters or system parameters will be removed.
Each URL parameter has the following fields.
Name | Options |
|---|---|
Attribute | The parameter name as it appears in the Parameter settings section. |
Query Key Name | The parameter name as it appears in the URL. |
Dynamic token or value | The parameter value. If this value is set in braces (e.g., |
The ‘Campaign Link’ block will display a preview of the campaign link with the currently applied URL parameters.
Example
Consider the example where Eversend can monitor the performance of its campaigns based on the names of Facebook ad campaigns.
A new user parameter is added in the workspace settings. Its name is set to
FB Campaign Nameand its user parameter issub_id_5.When configuring the campaign inside Eversend, the parameter attribute is set to
FB Campaign Nameaftersub_id_5is chosen in the dropdown menu. The query key name is manually set tocampaign_name. The dynamic token is set to{{campaign.name}}to match Facebook’s own dynamic token for ad campaign names.The campaign link then looks as follows.
https://yourdomain.com/?campaign_name={{campaign.name}}When a user clicks on the link, Facebook will substitute
{{campaign.name}}with its actual value....?campaign_name=SpringSale2025In the Reports section,
sub_id_5will show statistics aboutSpringSale2025and other Facebook ad campaigns.
Setting up the campaign destination
Switch to the Destination tab to manage various settings for the campaign destination.
Working with anti-fraud checks
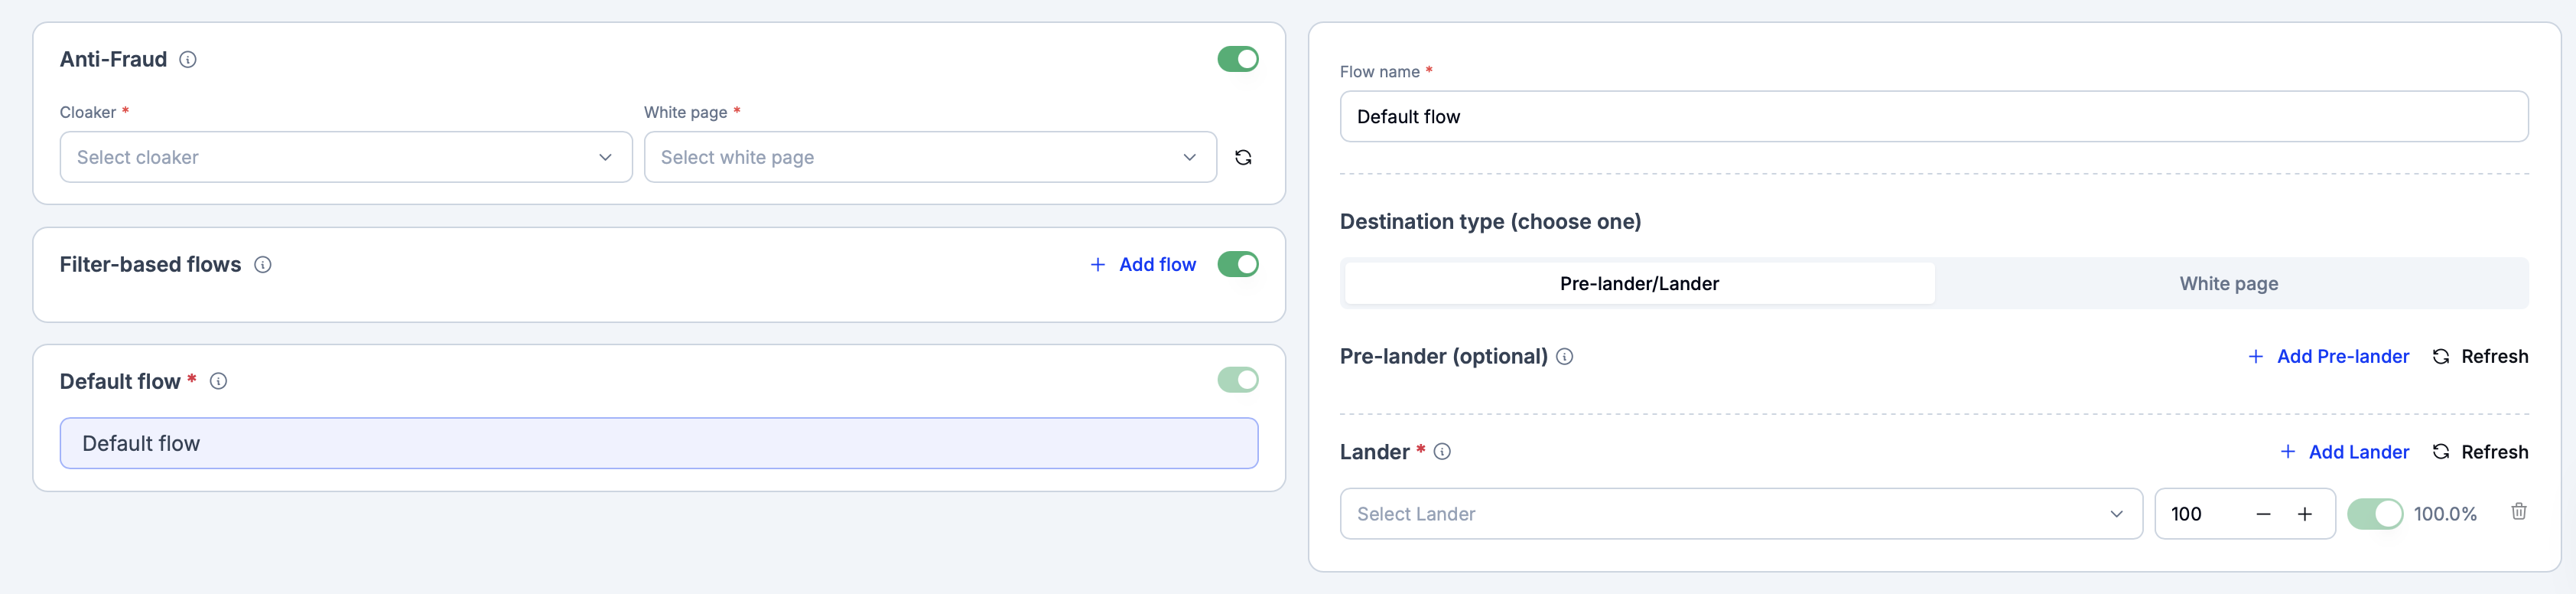
In the ‘Anti-Fraud’ block, enable the switch to turn on anti-fraud protection.
The following options are available in the ‘Cloaker’ dropdown.
Option name | Definition |
|---|---|
Adspect/Palladium/Eversend | Filtered traffic is sent to a specific white page. |
All traffic to white page | All traffic is sent to a specific white page. |
Then, open the ‘White page’ menu and set the white page template where such traffic will be redirected.
Info
Adspect and Palladium integration needs to be configured in the workspace settings. If ‘Adspect’ is chosen, Eversend will allow for using a custom stream ID if the ‘Use default for current Campaign’ switch is disabled.
Managing the campaign flow
Working with custom flows
Click on the ‘Add flow’ button in the ‘Filter-based flows’ block to add a new custom campaign flow. Existing flows can either be deleted or copied in the same block. If there are multiple custom flows, they are evaluated in the top-down order.
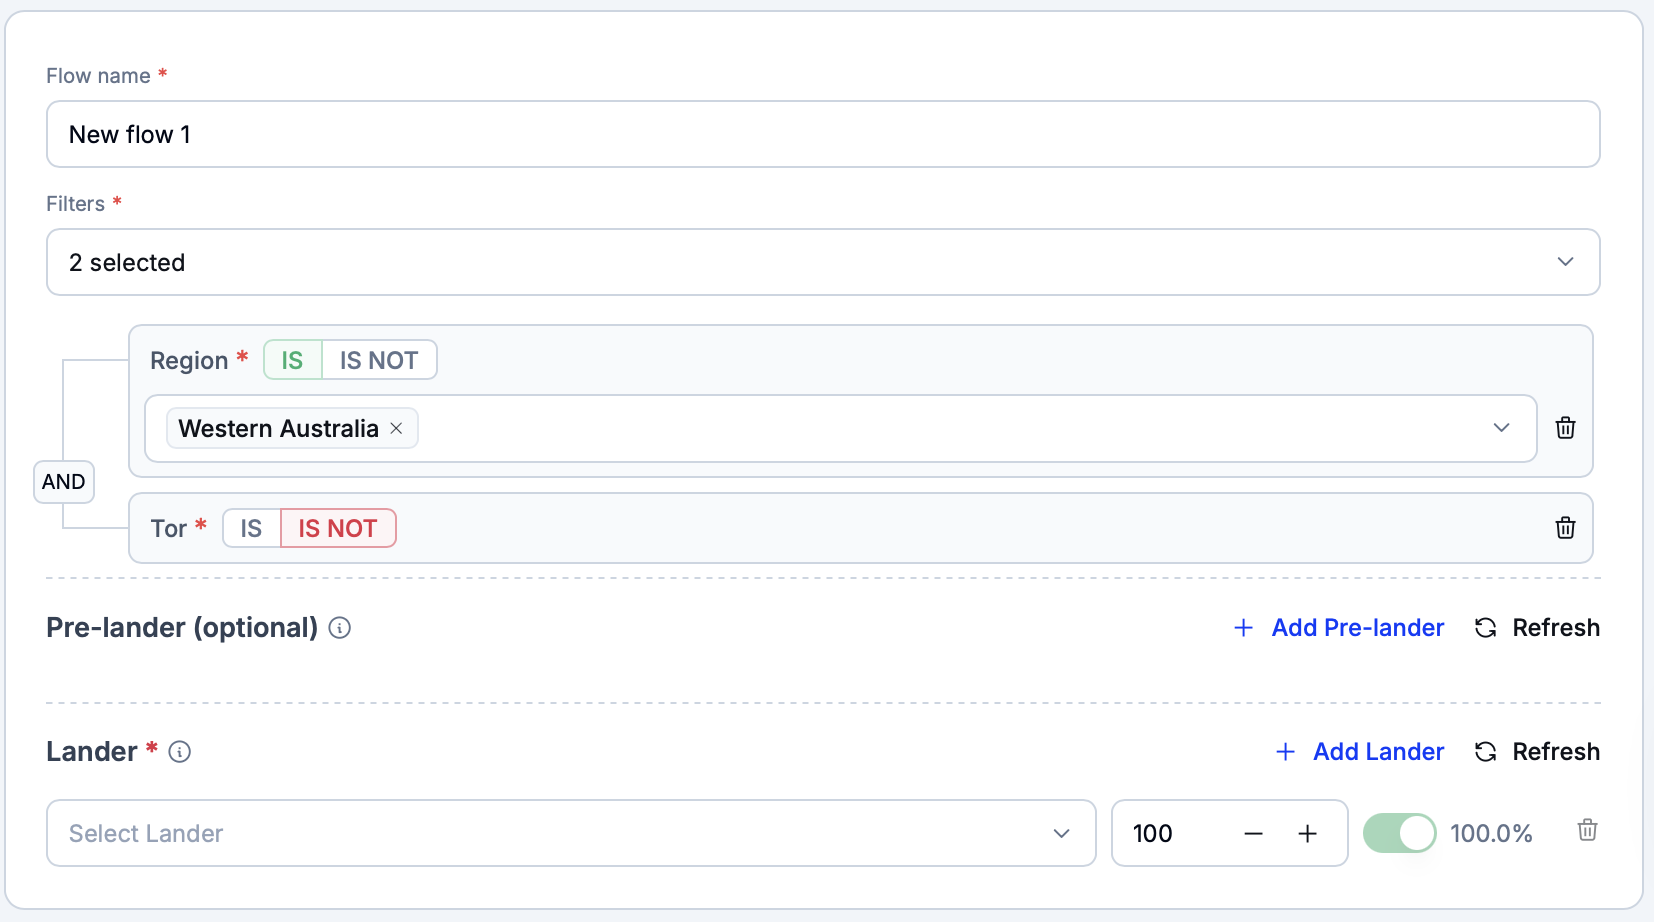
Set the flow name. In the ‘Filters’ dropdown, select all properties that should define the currently edited flow. Below, Eversend will draw an interactive graph of filters where it will be possible to configure the operators applied to each filter (either ‘IS’ or ‘IS NOT’) and the values that should fit these operators. For example, the below flow will apply to traffic from Western Australia who do not use the Tor protocol.
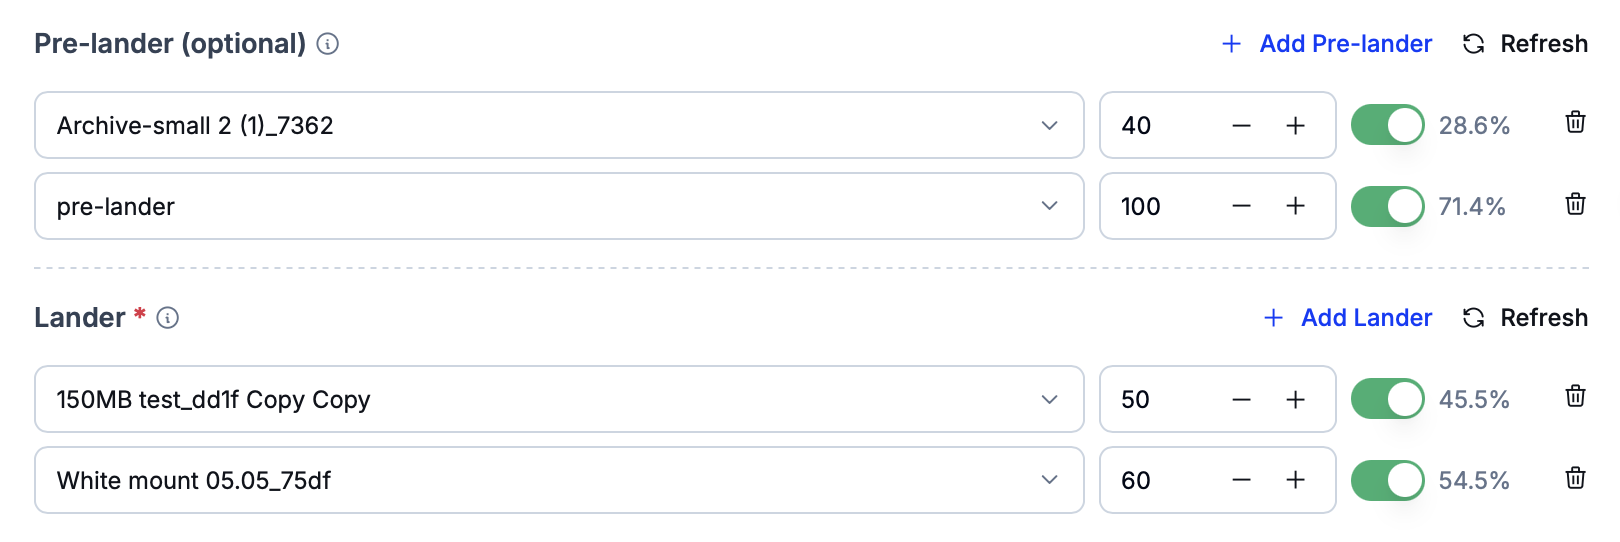
Below the filters settings, add the pre-landers and landers to which the flow should direct traffic.
Each template will appear as a row with a dropdown and a probability selection control. Select the required template in the dropdown and then set the probability of traffic being sent to it.
Probabilities
If the chosen probabilities do not add up to 100%, Eversend will automatically adjust them. For example, if two templates have a 100% probability of appearing, their actual probability will be set to 50% for each template.
Note that if at least one pre-lander is added to a flow, traffic will always be sent to pre-landers first based on the probabilities set in the flow settings.
In the following example, the flow will send traffic to pre-landers. If no pre-landers were set, the flow would send traffic to landers using the chosen probabilities.
Warning
If the campaign’s flow uses pre-landers, the pre-lander templates must include the
{{*offer_url}}placeholder as the destination of the button that sends users to the campaign lander. See the below HTML and JS examples.<a href="{{offer_url}}" class="btn">Go to Offer</a>window.location = "{{*offer_url}}"
Working with the default flow
The default flow applies to traffic that does not match any of the established filters. Click on the ‘Default flow’ field in the ‘Default flow’ block to open its settings.
Info
The default flow is only disabled if the ‘All traffic to white wage’ option is selected in the ‘Cloaker’ dropdown.
In the block to the right, set the name of the default flow and choose between whether it should send traffic to pre-landers/landers or a white page.
If the ‘Pre-lander/Lander’ option is chosen, traffic will be sent to the specified pre-lander/lander templates in according to the selected probabilities.
If the ‘White page’ option is selected, set the white page template to which all traffic should be sent when the default flow is used. It is possible to use the chosen anti-fraud white page by checking the ‘Use Anti-Fraud white page’ checkbox.
Info
The default flow only applies to traffic that does not fit any of the existing custom flows, meaning that not all traffic will be redirected to the chosen white page.
However, if ‘All traffic to white page’ option is set in the ‘Anti-Fraud’ block, all campaign traffic will be sent exclusively to the anti-fraud white page.
Press the ‘Create campaign’ button to finish campaign creation.
Editing an existing campaign
Click on a campaign’s name in the central grid to edit its settings.
This page displays the same settings as the campaign creation wizard. Finish configuring them and then click on ‘Save changes’ to apply the recently made modifications.