How to set up traffic campaigns
This article discusses how to configure traffic campaigns from scratch.
Introduction
The below diagram shows the key steps required for creating a traffic campaign.
flowchart TB
    STEP_ONE[Add new API integrations] --> STEP_TWO[Purchase servers]
    STEP_TWO --> STEP_THREE["Acquire domains and<br>configure them"]
    STEP_THREE --> STEP_FOUR[Create new templates]
    STEP_FOUR --> STEP_FIVE["`(Optional) Add<br>new traffic sources`"]
    STEP_FIVE --> STEP_SIX[Launch a new campaign]
Add new API integrations
Integrations with server and domain providers are required to purchase the infrastructure resources necessary for launching a new campaign.
To launch a new campaign, it is required to have at least two different integrations.
A domain provider (NameSilo or NameCheap)
Optionally, a server provider (BitLaunch or DigitalOcean)
Optionally, a CloudFlare account can be added for domain management
Adding both a server provider and a CloudFlare account is not necessary but at least one of these integrations is required.
To add a new integration, proceed to the API integrations section in the ‘Infra’ module. There, click on the ‘Add account’ button in the upper-right corner.
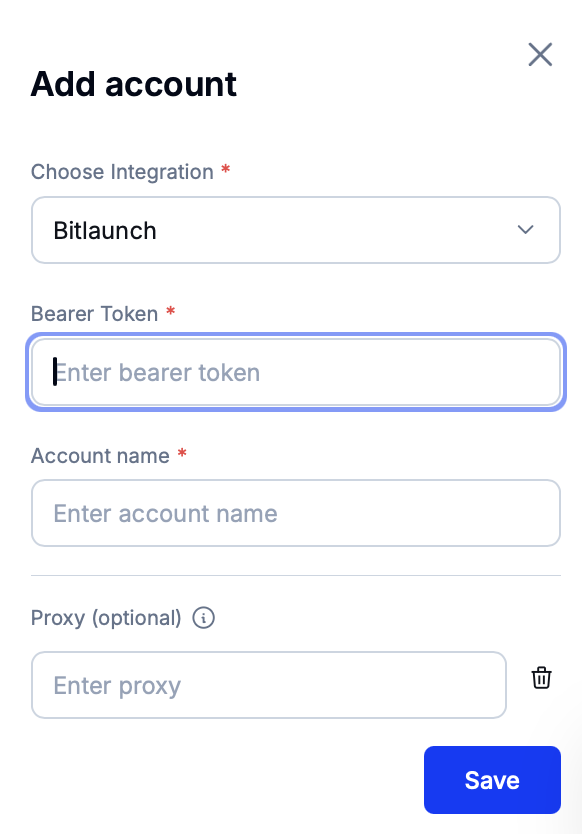
In the right sidebar, set the details of the new integration, most importantly the account name and the authorization token. Optionally, set a proxy string.
Info
The ‘Account name’ field is for specifying the integration name inside Eversend. The ‘Username’ field (if it exists) is for setting the name of the account registered with the external services provider.
Adding a CloudFlare account also requires specifying the email linked to said account.
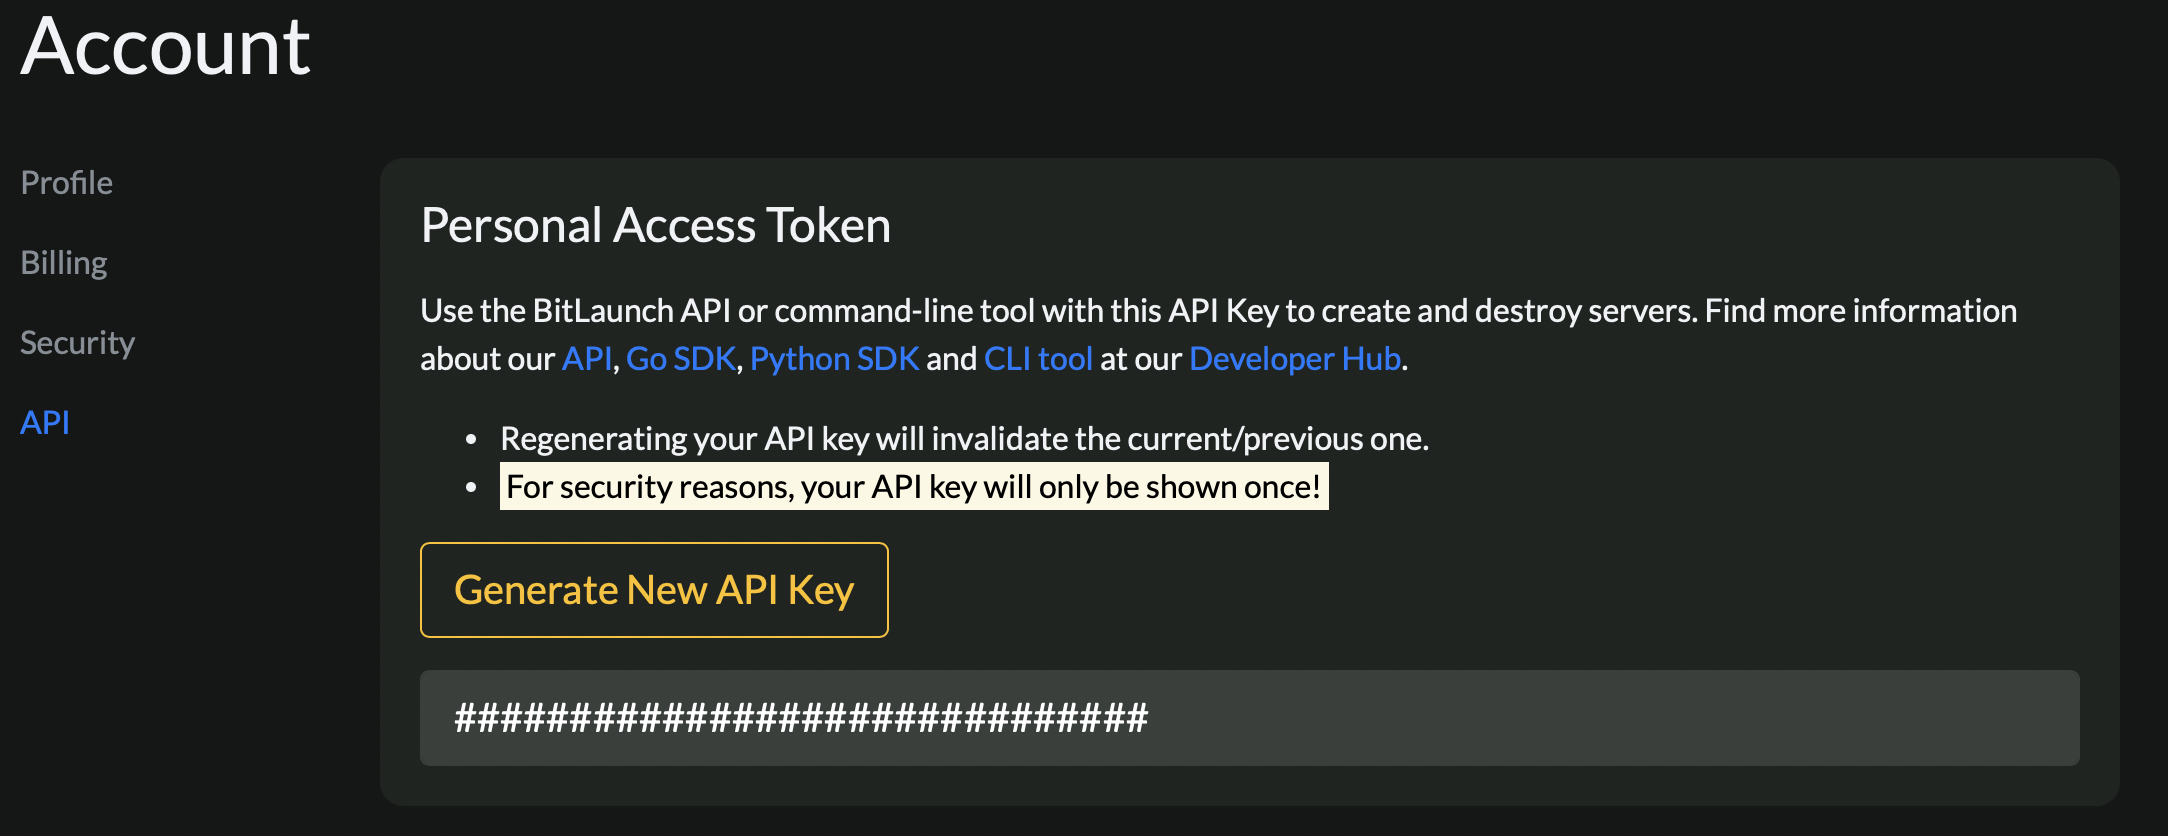
BitLaunch example
Inside BitLaunch, the authorization token is located inside the ‘API’ page in the Account section.
(Optional) Purchase and configure servers
This step is only required if a servers provider was added during the previous step instead of a CloudFlare account.
Servers are a type of resource that are used to host domains. To add new servers to Eversend, switch to the Servers section in the ‘Infra’ module and click on the ‘Buy servers’ button in the upper-right corner.
In the newly opened, select the newly added integration with a server provider.
This should open the server purchase wizard.
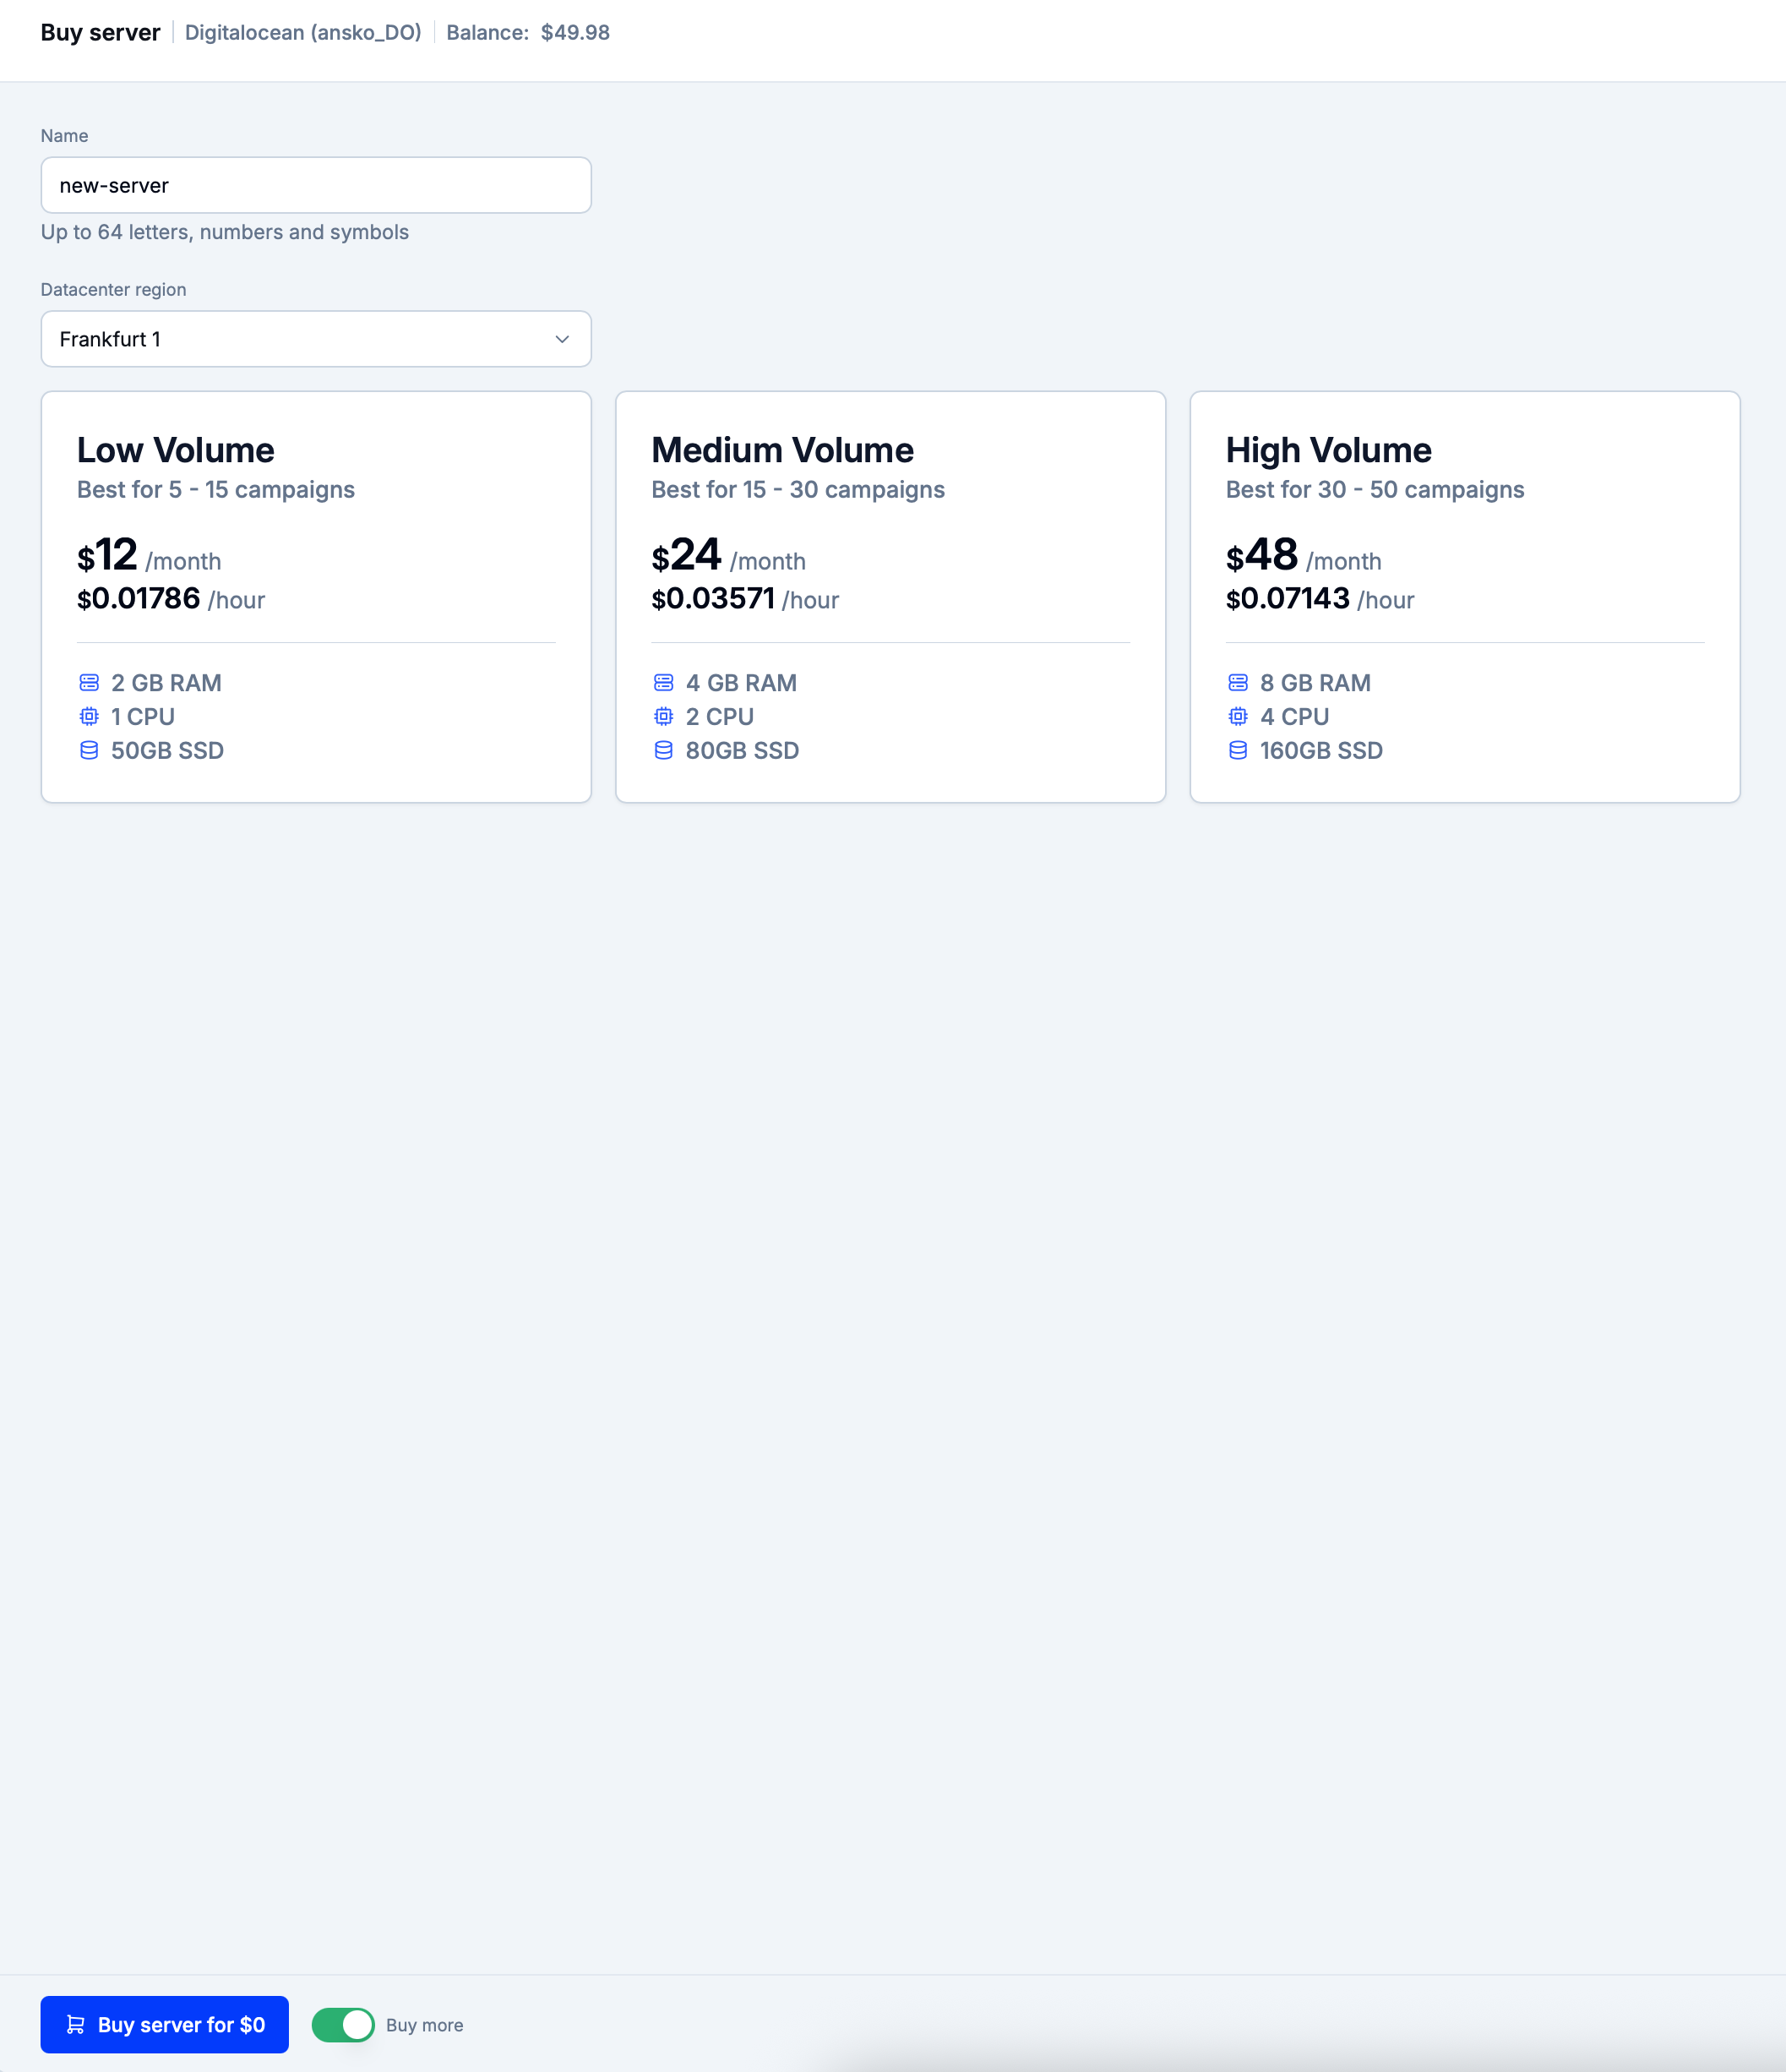
Set the server name and choose the data center location for Eversend to display the available purchase options. Choose one of them and click on ‘Buy server for…’ to add new servers to Eversend. Read this tutorial to learn more about purchasing servers.
Acquire domains
Domains are needed to deploy pre-lander/lander/white page templates where campaign traffic should be directed. Domains are hosted on servers or via CloudFlare accounts.
Switch to the Domains section in the ‘Infra’ module and click on ‘Buy domains’. Follow this tutorial to purchase new domains. Then, link these domains to an existing server or a CloudFlare account.
After geo propagation is complete, the new domains should be ready for use in traffic campaigns.
Create new templates
Traffic campaigns require page templates where traffic should be sent. These templates are configured in the Lander Pages, Pre-lander Pages and White Pages sections.
Upload the required campaign templates by following the steps in this tutorial. Note that campaign templates can use placeholders to display various types of dynamic content.
(Optional) Add new traffic sources
Traffic sources are pre-configured sets of query parameters for campaign URLs.
Creating traffic sources is optional before creating a new campaign but traffic sources can help in standardazing query parameters across multiple campaigns. Read this tutorial to learn more about working with traffic sources.
Create a new traffic campaign
At this stage, there should exist all necessary types of resources for launching a new traffic campaign.
Proceed to the Campaigns section in the ‘Traffic’ module and click on ‘Create new campaign’ to open the campaign creation wizard.
Set the campaign name and domain. Then, configure the campaign query parameters using the previously created traffic source(s) or individual parameters. Note that it will be possible to group information in the Reports section using any custom parameters added at this stage.
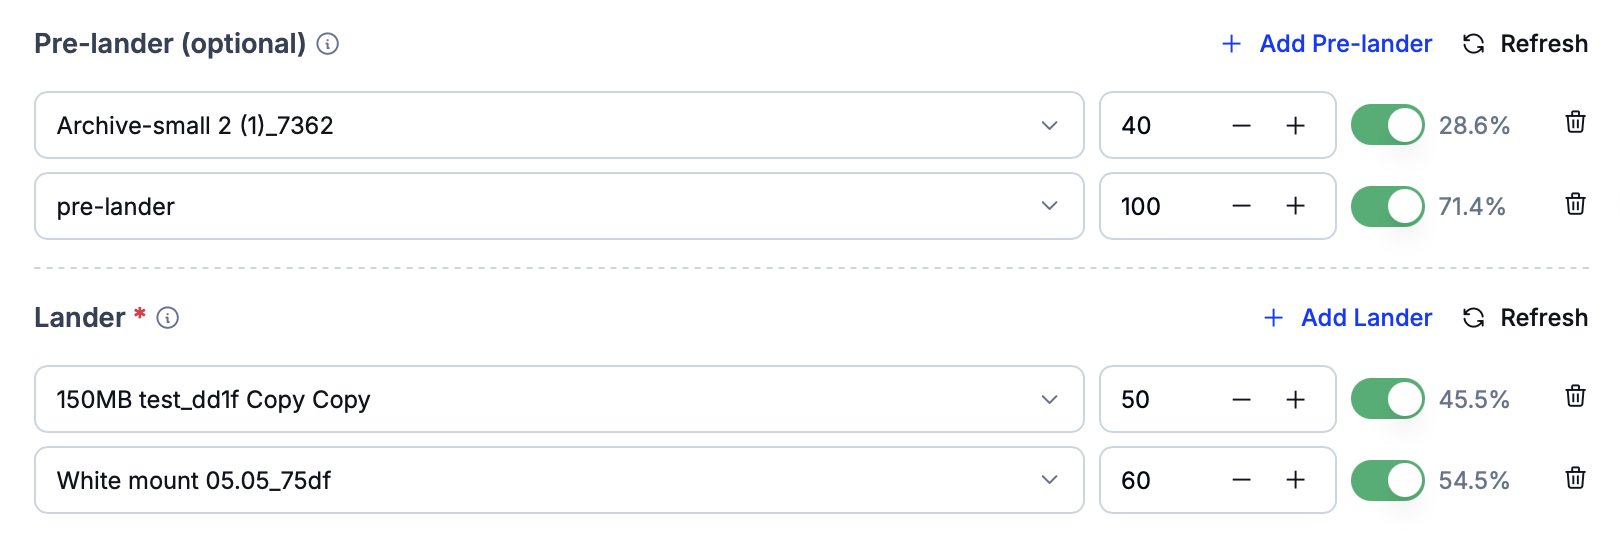
In the ‘Destination’ stage of the campaign creation wizard, configure anti-fraud rules. Afterward, configure flows and template probabilities so that traffic is sent to specific templates according to various filters.
Click on ‘Create campaign’ to launch the campaign. After domain propagation is complete, the chosen templates should become available at the selected domain when the campaign link is clicked on.